Saturday 8 September 2012

BMW E90 DIY Automatic Transmission Fluid Change


DIY Disclaimer: I hold no responsibility should anything goes wrong when you decided to follow my guide. It’s strictly meant as a reference for knowledge sharing purposes.
2007 BMW E90 N46B20
Mileage: 80k km
Transmission model: ZF GA 6HP19
1. Park the car on a level ground. Secure the rear wheel from rolling. I use a piece of brick.
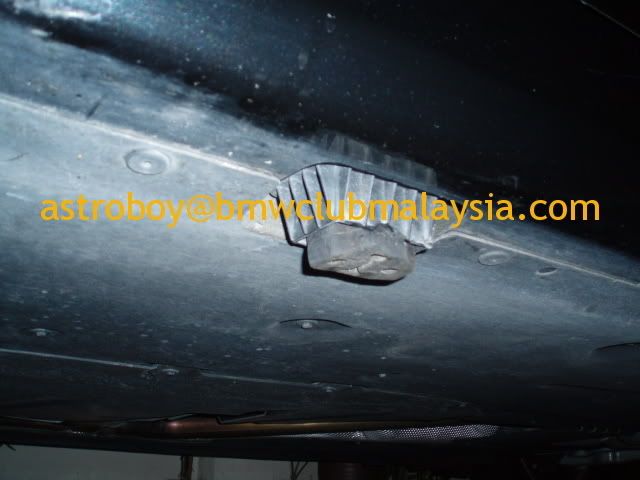
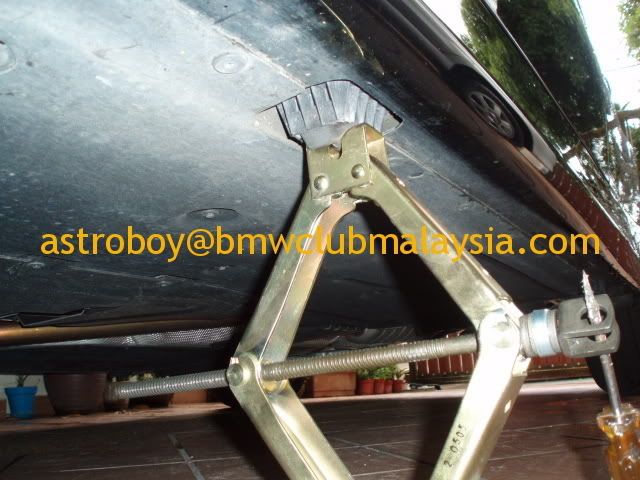
2. Jack up front left of the car. I use my Toyota scissor jack. A hydraulic jack would make the job a lot more easier.
3. Place extra support to prevent the jack slip. I use another brick below the raised front left tyre and a jack stand to support the lower arm knuckle end.. I also inserted a piece of solid rubber into the plastic jack stand point to prevent the plastic jack stand point from damage due to the incompatible jack used.


DSC_1098
4. Open the bottom shield (item 10) and ..

image
.. unscrew fill bolt (Item 3)

DSC_1124
Get the drain pan ready because old ATF may gush out when the fill bolt is removed, best just loosen it first and leave the bolt in place until step 5 below is completed.
5. Release drain plug (item 4) and the used ATF will be released.

6. Close the drain plug (item 4 above), don’t over tighten because it’s plastic, can break.. and they don’t sell them separately. It comes with a new plastic transmission oil sump.
7. Insert refill hose to feed new ATF. Do not push in too much as you can damage the transmission box’s internal fragile components.
8. Drop the jack so the car is level to the ground again. Refilling ATF must be done with car level to the ground.
9. Pump in ATF until overflow and that’s how they measure the level.
image
10. Start the engine with aircond running, and run through all the gears R, N, D, DS, M1~M6, 3 seconds for each with handbrake engaged and brake pedal firmly depressed. Then back to ‘P’ and let engine run for 3 minutes to heat up the ATF to 30~35 Celsius.
11. With the engine running, top up the fluid until it overflow. Make sure it’s not exceeding 50C because you will under-fill the fluid due to heat expansion.
12. Jack up the car again to plug the fill bolt and reinstall lower shield.
JOB DONE!! Smile
Some photos to help you better understand the procedure.
~ Getting ready the fill hose.
DSC_1096
~ Check out the other end of the clear refill hose, getting ready to be inserted into the fill hole.
DSC_1101
~ The tools that helped me open the fill bolt and drain plug.
DSC_1099
DSC_1118
~ Below is how the "custom” tool being used to open the plastic drain plug. I do not the a hex wrench that’s large enough, has to DIY the opening tool.. Smile with tongue out
image
~ Work in progress..
DSC_1104
~ Fluid used, the red cap is old stock, blue cap is new design. Old bottle design do not have an inner plug while the new design has. 4L is sufficient if transmission sump with embedded strainer is not replaced.
DSC_1105
~ Fluid level guide.. http://www.scribd.com/doc/97008578/6hp19-21-Bmw-Fluidlevel
ZFmanual3
After the job, I found few better ways to perform the job. Please stay tuned! Smile
Thank you for reading and please provide feedback or query if any.
Next job should be valve cover gasket..

Update: Found ZF Procedure in Video: https://www.youtube.com/watch?v=ZRrgmfM8VlQ

Saturday 30 June 2012

Avanza: New Rear Engine / Transmission Mounting (DIY)

2005 Toyota Avanza AT 1.3L

Mileage: 180k km

The repair job I did about 9 months ago failed again.

The vibration of engine can be felt in the cabin especially during high speed, so mush so there’s vibration on the steering.. Surprised smile

Finally settled with a brand new original mounting:

INSULATOR, ENGINE MOUNTING, REAR NO.1

Part no.: 12371‑BZ010

image

The mounting is actually located behind the transmission and fitted underneath the mounting bracket 12321E in the following diagram:

image


2012-06-30 13.39.18

The DIY write-up can be obtained from my last repair job posting:

http://upgr8s.blogspot.com/2011/10/avanza-diy-repair-transmission-mounting.html

I strongly advice Avanza owners conduct a periodical visual check on the condition of their mount [look out for crack lines, replace when excessive] because being a hardy Toyota, the car can still be used even when the mount is badly worn and if the owner is not particular or sensitive enough, may not even notice it. Driven around with a worn engine mounting may cause other components of the car to fail due to the excessive vibration of the engine, I suspected my ATF metal cooler tube ruptured by this excessive movement/shift of the engine/transmission, now suffered from leaky ATF.. Crying face

Next DIY will get it fixed, one way or another.. Winking smile

Thanks for reading and stay tuned for more to come.

Monday 9 April 2012

BMW E90 320i DIY Rear Brake Lining / Pad Change


DIY Disclaimer: I hold no responsibility should anything goes wrong when you decided to follow my guide. It’s strictly meant as a reference for knowledge sharing purposes.

2007 BMW E90 N46B20

Mileage: 70k km

2012-04-07 19.16.31

OBC says 410km to go and it’s in yellow warning display. Bought the lining few months back standing by for this change. GDB1612 (Rear), GDB1625 (Front).

When I open the box, surprised to see the metal guides and 2 pcs replacement screw included. How thoughtful..

2012-04-07 15.14.56

Steps to replace the brake lining:

1) Find a level spot on your porch, engage parking brake and get a stopper (I use a brick) to secure the opposite front wheel before we jack up the rear, to prevent the car from rolling, just in case.

2) Loose the 5 wheel lugs and jack up the rear. I start with right rear where the brake sensor is. Just in case it takes longer than necessary to replace the sensor.

3) Remove the wheel and slot it under the car as additional “insurance” just in case the jack slipped. Smile

4) The brake caliper design is different from the front, which uses a 7mm Allen key to open the caliper housing which the rear us using a size 13mm wrench. A size 15mm wrench is needed to stop the internal guiding bolt from rotating. There are 2 such size 13mm bolt to remove, upper and lower, to secure the caliper.

2012-04-07 15.26.48

5) Carefully remove the sensor cable, can unplug after or before remove removing the caliper. Your preference.

2012-04-07 15.15.34

6) This is how I push the caliper piston back into the chamber. Monitor the brake fluid reservoir for overflow when this is carried out because the returning of the caliper piston is forcing the level of the brake fluid reservoir to raise. 

2012-04-07 15.18.18

7) Replace the metal guides (supplied together in the new brake lining)

Bottom guide:

2012-04-07 15.21.21

Note: Check out the support I use to rest the caliper at the bottom right of the above photo.. LOL! Smile

Upper guide:

2012-04-07 15.22.31


2012-04-07 15.21.58

Note: Check out the new black bolts, the grey ones are the used bolts. They all are applied with tread lock compound. Funny thing is how come only 2 new screws are supplied? Is it I’m not supposed to open all 4 bolts? (2 each side) Smile with tongue out Maybe just open the bottom screw is suffice and flip the caliper up.. Disappointed smile

8) Slot in the new lining

2012-04-07 15.23.43

2012-04-07 15.25.00

9) Replace the sensor cable.. I was trying to reuse the old sensor cable but I notice some crack lines over it.. so I replace it. Need to open the rear portion of the wheel house shield because the the brake sensor connector is hidden behind it.. Be careful not to bend any of the pin inside the connector. There’s a guide in the connector to prevent the connector from wrongly plugged. Align the guide carefully.

2012-04-07 15.37.02

New versus old:

2012-04-07 15.40.51

DONE! Check out the brand on the caliper, it’s made by TRW.. Smile

2012-04-07 15.44.59

Thank you for reading, comments are welcome! Smile

Update:

Just found this

BMW TIS - 34 21 200 Removing and installing/replacing brake linings on both rear disk brakes (TRW floating caliper)

http://tis.spaghetticoder.org/s/view.pl?1/09/80/63

image

image

image

So according to the guide, only the bottom bolt needs to be opened and replaced, and tilt the brake caliper upwards for lining replacement job. Now I know lor.. hehe! Smile