Friday 12 October 2007

DIY K&N Cleaning

Been running my K&N for 20k km now. Suspect the efficiency has somewhat deteriorate, despite sun light can still penetrate the element.. :P

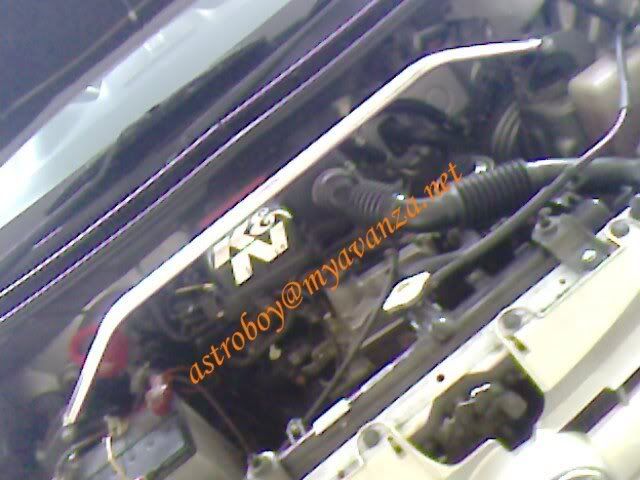
By chance, a friend came along for TT and he introduced me to a place for cleaning our K&N for RM8.40 per wash and oiled, somewhere at PJ 222. We made few wrong turns and finally reach the place. It was non other than….. “SPEEDWORKS” ~ the sole agent for K&N!

Meaning they actually use the original cleaning agent and oil it with original lub, confirm! No ragu-ragu! ;D Still remember more than 10 years ago, my pomen did it for me for RM10 and it’s cleaned by petrol and oiled with power steering oil. :( So this RM8.40 is DAMN CHEAP!

We happily went in and soon realised our lady luck was not with us. They actually ran out of cleaning agent!! They still have the retail pack though but I refused to buy because my store room simply run out of space, and not ready to part with my near RM100 despite my friend want to share the filter charger with me.. ;D

Contacted an old friend from the industry and consulted him on what is the suitable oil to apply on K&N filter. He told me to use mineral engine oil because that’s the mildest, non-corrosive oil in relation to all the other automotive lubricants.

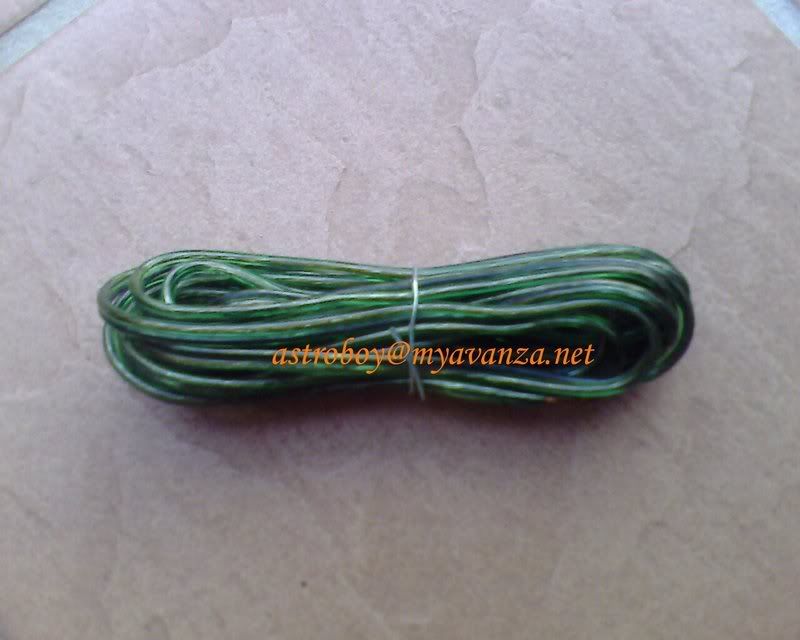
Then I complaint that the oil should be in “RED”, not gold or clear mah! Then he asked me to use 2T oil la! Bingo… that’s the answer!

During a filling trip to Shell, I went into the Shell shop and look for 2T oil. To my surprise, they have more than 4 types of 2T oil !! from non-synthetic, to super, to synthetic for a price difference of about RM1 between the most expensive and the cheapest. What a market strategy!

Anyway, I bought the cheapest one for less than RM5 per 500ml bottle.

By the way, the oil applied onto the K&N filter element is to keep the element damp and of course to absorb dust particles and that’s about all. Just need to be careful in choosing the non-K&N specified oil to make sure its non-corrosive in nature so it doesn’t damage the element in the long run.

Ta..DA.... Let’s do it!


Fill the kitchen sink with tap water and add detergent (I used 2 tea spoons of Dynamo.. ;D)


Try not to fill the sink with too much water (no more than an inch deep) because u don’t want to submerge the K&N into the water and allow dirty water to mess up the clean side of the filter. Actually the heavier dust particle will settle at the bottom of the sink lio la. Not to serious wan la. I am just being demanding.. :P

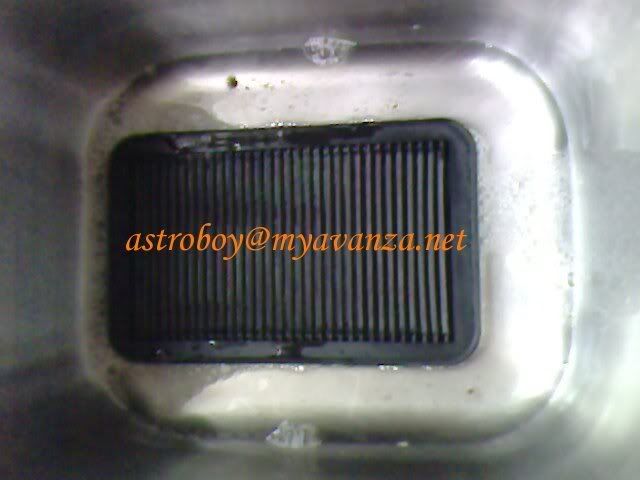
Use both hand to grab the filter and move it in & out of the soap water like you want to choke some one to death.. :P


After few “choke”..


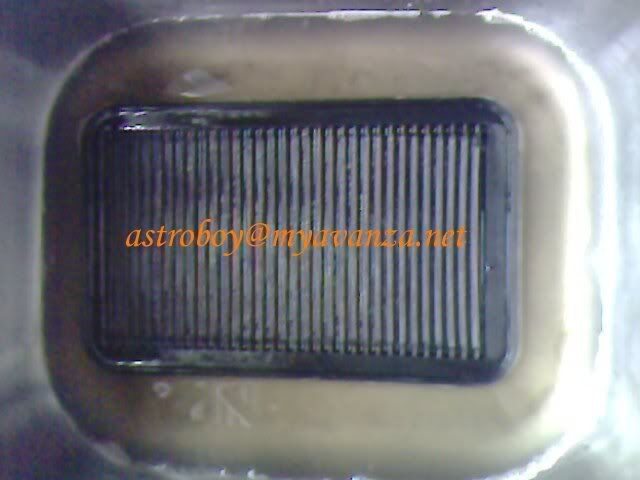
After about 20-30 “chokes” and I think enough lio.. [b]Remember[/b], u r not removing the oil. You r just removing the dust particles that stuck on the element. So its alright after the 30 choke, your element still felt oily.


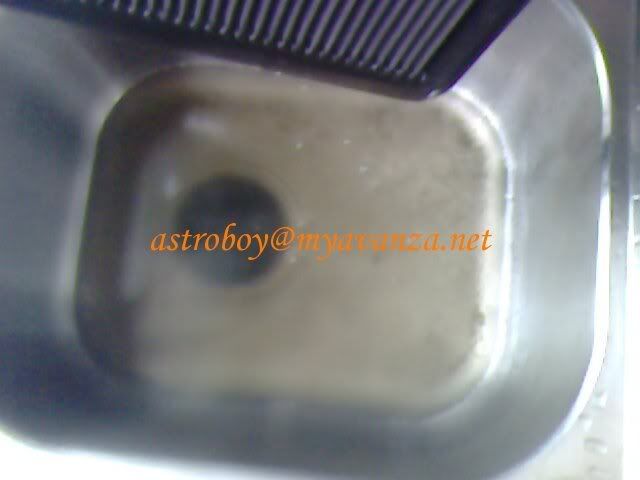
Rinse it with clean tap water, again, clean water should go in from the clean side of the K&N to bring dirt out through the dirty side. Avoid high pressure tap water which can damage the element. Replace the dirty soap water in the sink with clean tap water and “choke” the K&N again to get rid of the soap water. One rinse should be enough.


Let the filter drip dry for about half an hour on my still warm engine. No need 100% dry la. Then prepare for oiling.. ;D Check out the oil I used.. :P ;D


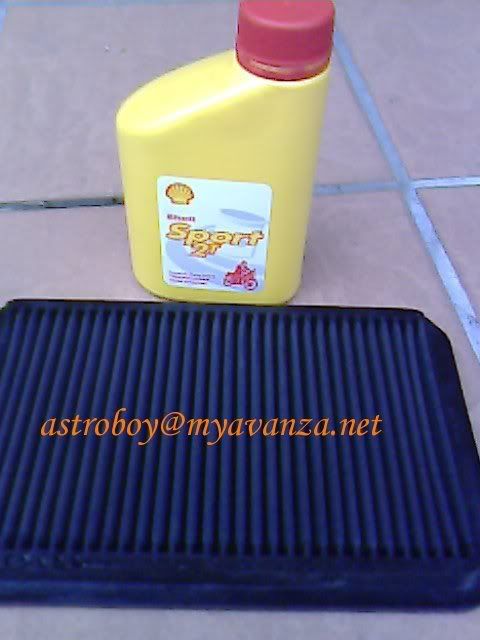
When I opened the 2T bottle, I was shocked :o to find out that the 2T I bought is actually GREEN color !!! :o :o Now I’m running a GREEN K&N filter :( ;D I use about 3 cap full of 2T oil applied on the element. Not to worry of applying too much as excess oil will be sucked into the combustion chamber and burn together with the petrol and blow out through the exhaust. Hey! your exhaust now is more lasting as it too get oiled.. :P ;D


Disclaimer: You attempt the DIY at your own risk of damaging the filter element. On the safe side, get it cleaned by Speedwork for RM8.40. DIRT CHEAP minus the dirt on your hand! And be careful when drying your K&N because one of our member’s K&N kena stolen when drying on the house pagar.. :P ;D

Saturday 25 August 2007

DIY Foot Well Light ( Part 2)

PART 2.....

This is to complete the both front foot well lighting.

Bulb used.. 12V 5W: RM2.90 (Tesco). What happened to my LED bulb? I gave up.. u can see it in this photo (left unit).. The illumination coverage for LED is too narrow.. :-/ So I choose to use normal bulb.


Close up... :P My phone camera not doing a good job.. ;D


Same like the driver seat foot well light fixture but this time, I use hot glue to seal all exposed connection to prevent the life cable from short circuiting with the surrounding earth.


Unlike the driver side installation, this time I did not drill hole. Just cut a gap at the edge and push the light fixture in.


Better view of bulb at its actual location..


When lighted...


From far..


The complete picture..

Tuesday 17 July 2007

Avanza: Speakers Upgrade Part 2

PART 2.. ;D

Finally have chance (not time.. :P) to complete my speaker upgrade. Front speaker was completed in Apr29, 2007. Been keeping the 2nd set of speaker deep inside my store room, away from my home minister’s radar.. :P

Okay.. here goes..

Main ingredient for the day.. The speakers.. MB Quart PCE216..


More info on the box.. it shows few ways to install the speakers.. all bracket and screws included… but I did it my way.. :P ;D


Door panel removed..


Pillar panel removed.. looking for place to hide/mount the gigantic crossover.. :( testing to tuck in the crossover.. VIOLA !! perfect spot!


Remove the speaker..


Wind down the window to check for clearance for the speaker..


Check out the window panel behind the plastic protector..


Plenty of speaker clearance..


No problem at all because when fully wind down, the glass does not reach the speaker cavity. Meaning u can install speaker with monster size magnet also won’t kena the window.. ;)


Once the above was confirmed, it took me more than 30 min to hunt for my speaker cable, bought long time ago from hypermarket AV section for few Ringgit for my hi-fi, which has now retired.. :P


Insert a harder wire (red) into the wire tunnel as a guide to pull my speaker wire in..


Speakers installed.. noticed the plastic ring used as a base for my speaker.. it comes with the speaker set as frame for the mesh wire cover but I use it as a base to raise my speaker.. even though plenty of room behind but the speaker too big in diameter.. sangkut the lobang and can’t sit in properly.. still need to raise.. :(


Check out the vibrating water proof diaphragm.. ;D


Now the panel.. just like the front panel, need to trim because we have raise the speaker and the vibrating diaphragm will hit the panel..


My rusty knife at work.. :D Luckily not rusty hand.. :P


Now the tweeter.. make room for wires..


Use a satay stick to push it in… satay stick is available in my tool box, perfect for such application (won’t scratch the car)… :P ;D


Connecting all wires to crossover..


Check out where I hide the crossover.. :P Just nice.. ;D wrap the 4 edges of the crossover with some left over sound proof material to prevent the crossover from knocking all over the place..


Seat belt roller installed..


Now fabricating the bracket to gantung the tweeter.. This tweeter is a slightly bigger than my front tweeter (DSD216 series).. but same method to gantung..


Did the satay stick trick.. and lay the wire down… notice now I’m using the cheapo black/[color=red]red[/color] wire.. :P my speaker wire runs out.. :P Also pay attention to the rusty section under the step plate.. :( Now I desperately need to get my Avanza some touch up paint.. :o


Check out both my front and rear tweeter.. ;)


Rear tweeter close-up..


I decided not to hang it at the rear (3rd) pillar because:

1. more work :P
2. more wire ;D
3. too far for the rear tweeter to project to the driver/front seat, thus possibly creating irritating, ghostly :P echos.. ;D

Now waiting for rear speakers to run in.. can someone pass me a muffler for my ear please.. !! :P I shall need it for the next 2 weeks, at least.. ;D

In fact last night at the Bangsar TT after the dinner, keltan23 had a chance to test out my front speakers.. while my rear is half done.. :( He keep asking me one question.. “sure or not no amps !!??” ;D ;D

Oh..yah.. all photos taken using my 1.3MP camera phone ;) .. my 7.1MP Olympus is oversea at the moment.. :P ;D

Saturday 26 May 2007

DIY Avanza Front Brake Pad Replacement

Just bought this set of front brake pad..


Cost me RM95..

The spare shop ask if I wanted cheap or orginal one.. I asked him what's the different, he said the price lor... :-/

I ask him to show me because from the workmanship, its pretty easy to differentiate..

The shop keeper went to the back of the shop and return with only the original and say.. "Aiyoo, only original left woh.."

With no option at all, I just grab loh.. :-/

Mileage.. 50k km..

Step 1: Place a brick at the opposite rear wheel. If you r jacking the front right, then place the brick at the left rear. This is to stop the car from reversing and move on three wheels..


Step 2: Loosen the wheel nuts before jacking the car. This is because after the car is jacked up, its difficult to loose the nuts as the wheel keeps rotating and its difficult to apply force to loose the nuts.

Step 3: Start jacking the car. Please pay attention on where to jack. This is important because you don’t want to jack the wrong place. Jacking the wrong place is both hazard to life and may damage the chassis.


Step 4: Rotate the wheel so the air valve is on top. This is a marker to make sure when putting back the wheel, its returned to its original location. A wrong position may result in vibration. Of course, provided that you don’t rotate the brake disc la. (Trick: If you have to rotate the disc, then screw back a nut to identify the valve location.)

Step 5: Now u can take out the wheel.

Step 6: Get a size 14 ring spanner to remove the bolt as shown on the photo. Normal thread, don’t turn wrong direction. I find many members have difficulty removing nuts or bolt facing inside out. I too, sometimes confuse.. ;D


Step 7: Once the bolt removed, flip the calliper upwards. After which the brake pads are exposed. Just tarik the pads keluar. You may want to use a screw driver to korek it a bit but make sure you don’t apply force that can damage or scratch the disc surface or worst, bend the almost an inch thick disc... ;D


Step 8: You will now notice the used pad have a metal piece sticking out. That’s the wear indicator. Meaning when the pad habis, that metal will scratch against the disc and produce “geeeeek....geeekk...” sound. After which it will leave some scratches on the disc.... :P That’s why I usually never wait until I hear the sound.. ;D Just like the low fuel warning lights. Only good for people who keep forgetting to pump fuel or worst still, seldom pay attention to the guage. That’s why the car designer decided to lit up a warning light when low fuel.. ;D Too bad our brake pad have no “low pad” warning lights. My X-car got, and every time the light lited, I have to fork out RM16 to replace the thingy. It’s a glass-made grounding switch. The moment the pad is too thin, the disc will scratch the glass and break it. Inside the glass got tiny wire which when touch the disc (earth or -ve), the warning indicator will lit.. Ok.. back to Avanza.. :P ;D keltan and rfalmrf.. inspired ??? ;D

The following photo is after I have transfered the metal wear indicator to the new pad


Step 9: On the outer pad, there’s no wear indicator but there’s this metal sheet. Transfer the sheet to the new pad as well. That’s a very important “gadget” to disseminate heat from the pad and to stop or rather reduce vibration on the pad. I just don’t understand why the inner pad tak ada this metal sheet ???


Step 10: Pasang balik the pads.. Viola!


Step 11: The next step is the major reason why many rather let the workshop earn their money. The piston that pumps onto the pad to result force against the disc when braking, needs to be forced back into its chamber. Otherwise, you can’t flip the calliper back to its working position because the now thicker pad will sangkut the calliper.

The right way to do it is using a special tool. I call it a “reverse-clamp” (don’t know its real name.. :P). Like a desktop clamp, but it works on a reverse way. Instead of clamping in, it extend itself outwards to push the piston back into its chamber, with one end on the surface of the piston and one end on the calliper opposite the piston. Using the clamp is easy and can prevent the piston returning in a senget position and damage the chamber cylinder.

This is how I do it… ;D

B4.. look at the position of the piston..


After.. look at the piston position again, it has now retracted into its chamber.. No need special tool.. ::) ;D but make sure you are gentle with it. Don’t force it too hard. A slight senget of the piston will potentially damage the chamber cylinder.. Be careful!


Step 12: After pushing back the brake piston, must quickly check the brake fluid level because the fluid that filled the calliper chamber has now been forced / pushed back to it reservoir and potentially cause overflow to the reservoir if the level is too full. Normally we do not top up our brake fluid because when the level is low, its most probably the brake pad sudah makan and more fluid needs to fill in the calliper piston chamber. This causes lowreing of the fluid level at the reservoir.


Step 13: Return the calliper to its working position and put back the size 14 screw. Then done lor. So simple that I forgot to take photo.. :P realise only after I put back the wheel. Anyway, this is it.. pay attention to the lower size 14 screw. Its now a bit kilat.. :P because we have worked with it.. ;D


Step 14: Now repeat the same with the other wheel.. but I was lucky enough to get an apprentice.. :P ;D who is still on pyjamas.. :P


More photos:
The used pads still have 1.5mm to 2mm but I decided to retire them.. The used ones has DAIHATSU imprints but all this while I not too happy with this original pads. Hope the Toyota brand is better.. :-\


Compare the inner wear among the pads.. not even..


Compare the outer wear among the pads.. not even.. meaning when check for pad wear. Don’t just check one side, must check all sides, in-out-up-down.. Nothing wrong with the brakes. Such uneven wear is common. If you get even wear, now that’s uncommon.. ;D


Fluid level after pasang both front pads. Very penuh because when I did my 40k km service, the SC has replaced the fluid with new ones and return it to MAX level.. without consideration of wear brake pad. See now what happens !!...


I recently bought front brake pads for my Perdana too. Cost me RM75 only.. and check out its wear indicator.. comes with the pads.. Love the blue color.. ;D but too bad different size with Avanza. Otherwise, I would have put it into Avanza.. ;D


WARNING:
1. All brake pads need to run-in and don’t forget to pump the brake pedal a little to force the brake calliper piston to return to its working position when use it for the first time.
2. Check the calliper screw which we buka just now, from time to time to make sure its not loose, I always worry too tight will damage the thread and too loose its dangerous. So got to check frequently. This is a life saving part of the car. Don’t play play. Even the workshop people do also I don’t trust.. :P