Monday 30 October 2006

A "simple" sound proof option..

When I did my all-round RDS, I realised 2 things.

1. The OEM door trim is removed and felt sayang to throw away.

2. Need to open and trim the plastic side panels that will eventually "grab" onto RDS. This include the rear panel that's very hollow internally.

And as inspired by the new Camry, I saw its front fender is sound proof with certain material that I'm gonna go through next... ;D

Project: Sound proofing for rear side panel, applicable to fender and boot lid.. ;D same concept.

Time: Lost count.. :P

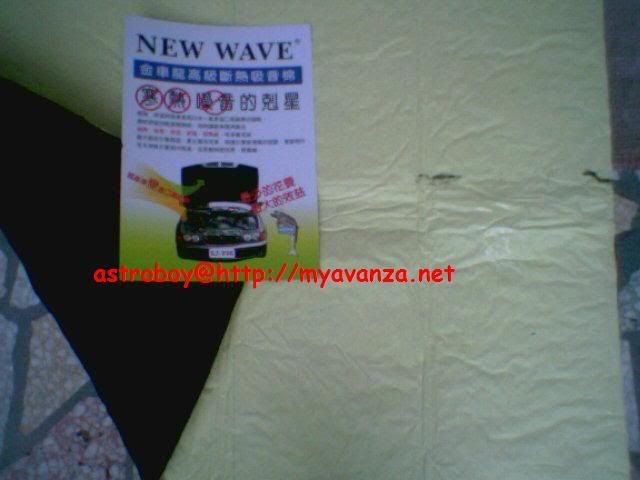
Material: Styrofoam, OEM Avanza door trim, double sided adhesive tape.

Cost: Almost free.. ;D

Tools: Cutter, screwdriver, pen knife and a pair of "skillful hands".. :P

Steps:

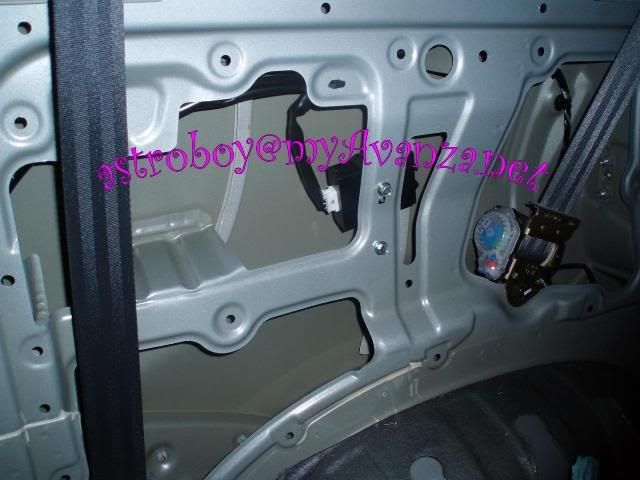
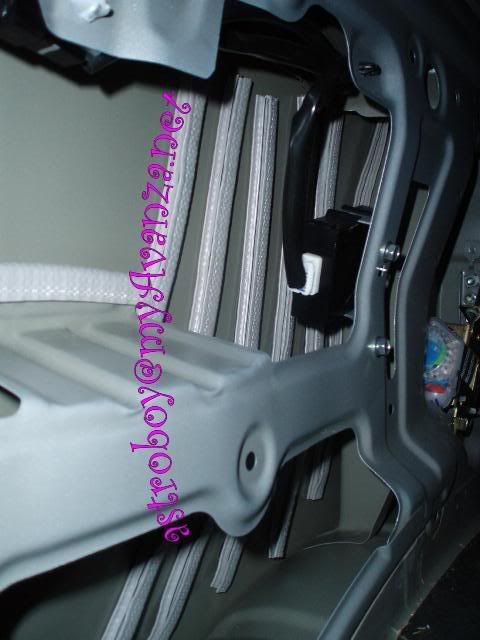
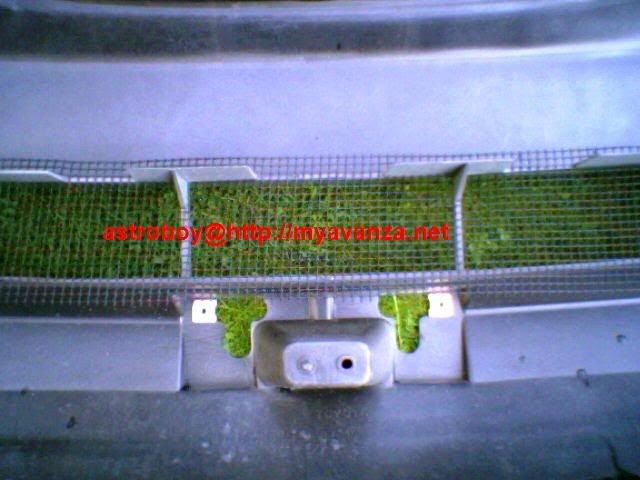
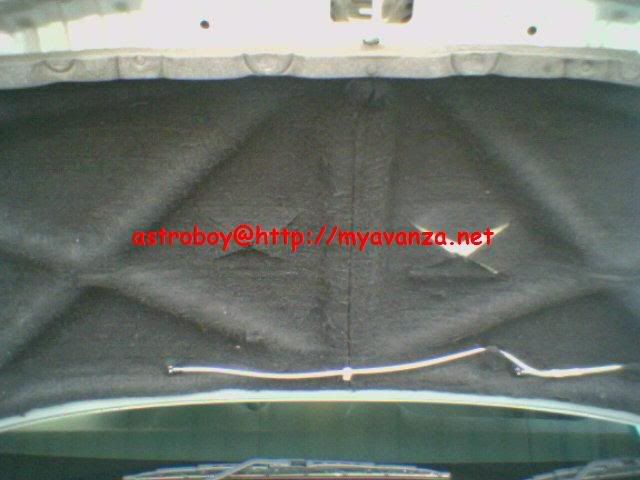
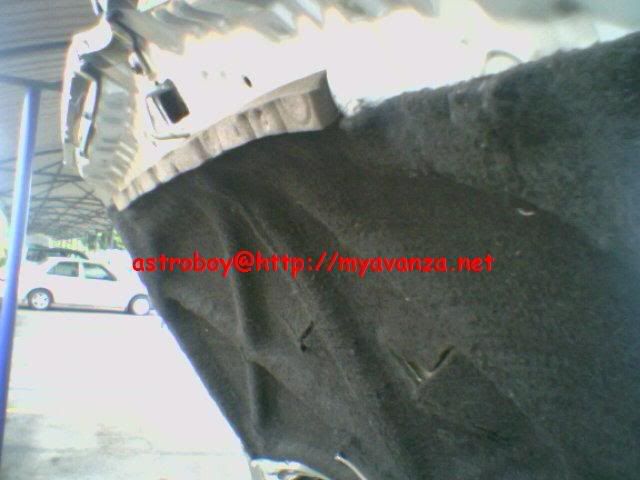
1. Remove the panel. There's two plastic clip fastening the panel to the cabin floor. Must first remove the clip. Then its all cabut-tarik-kind-of clip.. ;D

Warning: Do not need to remove the cup holder and other storage tray on the panel because unlike our door, its all screwed from inside. I tried cabut the trays and broke its internal mount. A "price" I had to pay but learn from mistake.. :'(

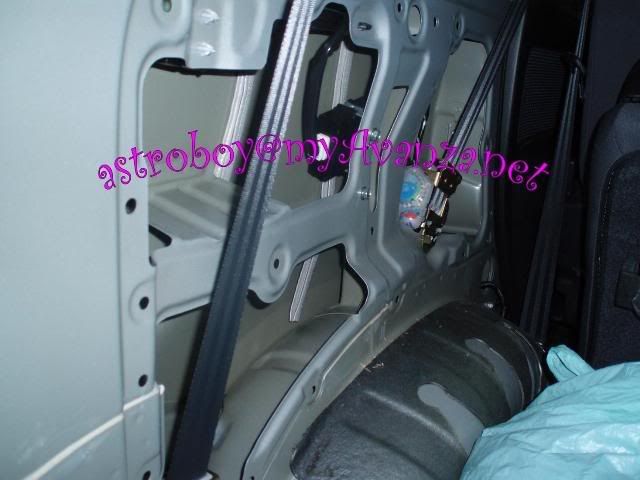
After the panel is removed, this is how it looks like:


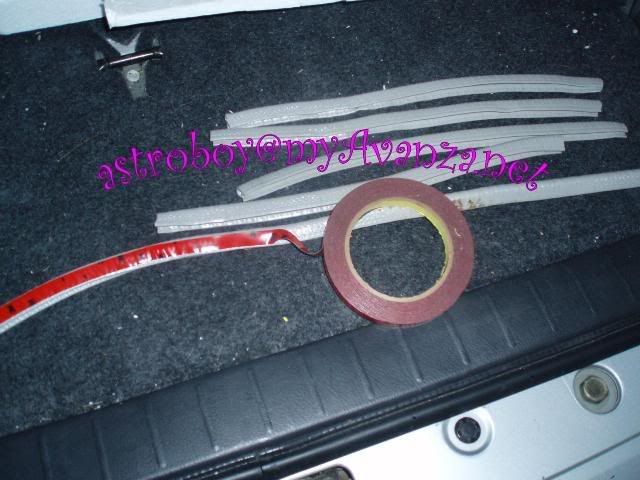
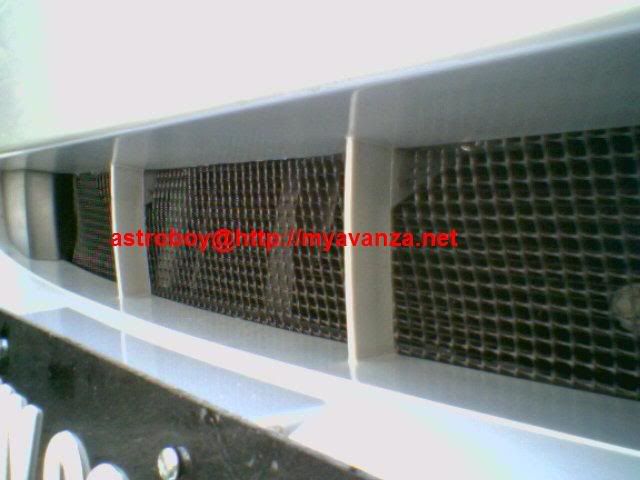
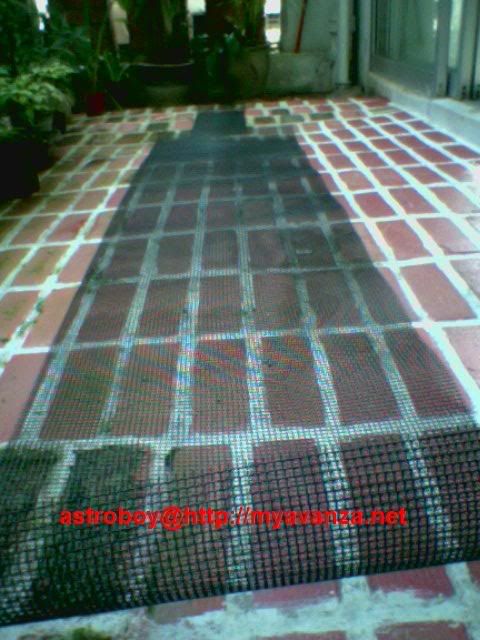
2. Cut the door trim into short strips with cutter, and put on the double side tape, like this:


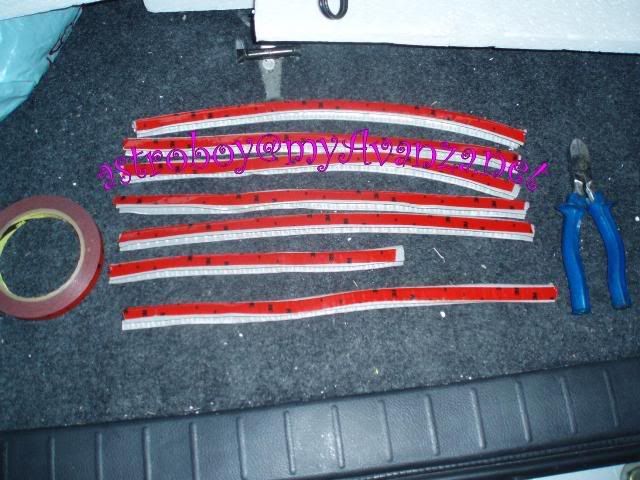
3. Then stick the strips to the fender one by one. Make sure u don't remove the tape protector at first. There's some contour on the fender u need to bend the strip at certain "curvy" area.. ;D

Then remove the protector by an inch, press it onto the fender, then pull the protector away while pressing the strip onto the fender surface. This will ensure the strip stay on where you want it to be to avoid "sticky" mistakes.. ;D

I decided to stick them vertical so if really water masuk, it will not takong air and become mosquito beeding place.. ;D

Then it will look this this:


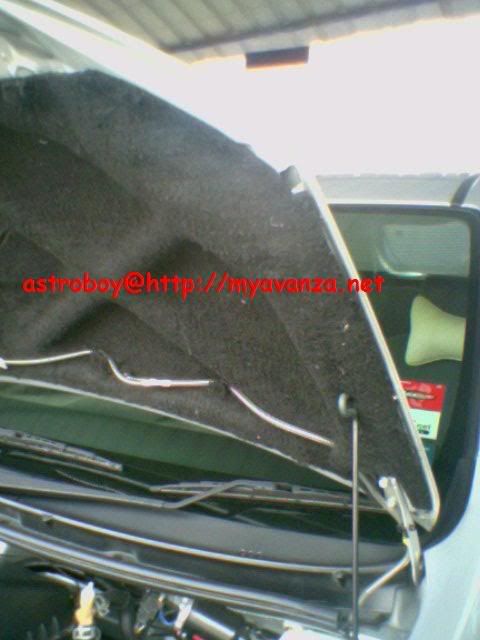
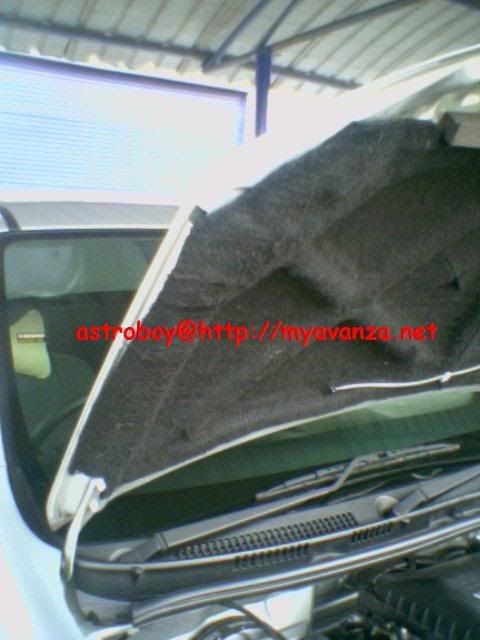
4. After all the strips has gone it, then its stuffing time like the Thanksgiving turkey stuffing.. ;D with styrofoam pieces.. ;D and it will look like this:


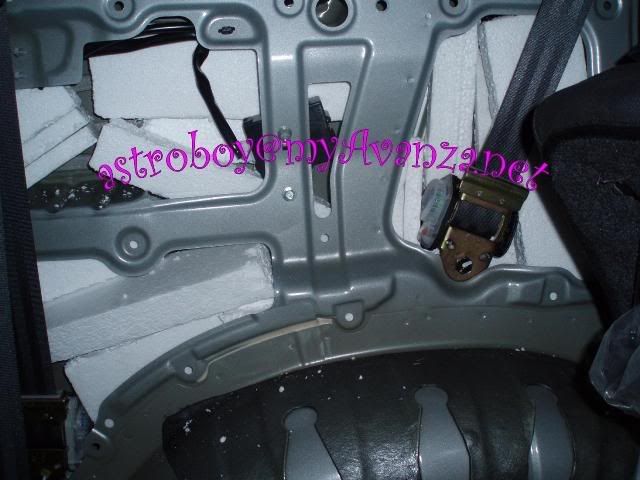
Make sure u don't block the air vent at the bottom of the fender (put your hand in and you can touch it, in the fender area, under the tail light, toward the bumper). If that's blocked, closing of door can be a hassle and can potentially cause window breakage due to closing door pressure, may even break a baby's ear drum... :o So make sure there are gaps in between the styrofoam for air to escape through the air vent.

5. Then put back the panel lor.. ;D

Why styrofoam? Its the prefect material for sound proof and heat proof for hollow area. That's why Camry uses it for its from fender. Just open its front door and peep inside the fender through the door gap.. ;D

Styrofoam is a near weight-less material and is water proof. Its being used for many applications like thermo flask, Coleman, cyclist helmet, fish tank padding.. ;D

Can't use it for our doors unless you don't intend to open your windows.. :P

Good "trash" recycling project yah.. ;)

Sunday 3 September 2006

DIY Avanza Rear Absorber Replacement

Tools: Size 17 wrench

Time: 20 min. (comfortably) or 5 min. (Rush job)

Pic1: Unscrew the top screw, size 17


Pic2: Unscrew bottom screw, size 17


Pic3: Grab the OEM absorber by reaching our hand in from the fender and pull the absorber out from its mount. (Typo: ..Top OFF..)


Pic4: Red vs Black


Pic5: Final result.. ;D


Installation of new absorber: No picture taken here because not enough hands.. :P

1. Mount the bottom end, insert screw.
2. Use hand to force the absorber to contract until max, then let it rebound but quickly push the absorber top back into the top chassis mount screw.
3. Fasten all bolts.

Note: Do one absorber at a time.

Must read:
When take her out for a test ride (dinner with family). First 100 meter was smooooth…, then the knocking sound came… “k-lok..k-lok..” like riding a horse..

Started from the left rear, then “infected” to the right rear too. Then it “k-loks” all the way to dinner and back. Everyone was in fear that the wheels may drop off any time. I stop the car, check for loose screw (visual). The bolts are still there woh.. ::)

After returning from dinner, went under again to inspect the job. Found the screw somewhat loose !! Screw it back in, test few hundred meters round our garden, high speed. A-Okay!

Morale of the story: No matter how small of the job can be, or how confidence are u in the job, ALWAYS test drive the car for reasonable distance after ALL DIY jobs to ensure things are done COMPLETE and all screws are tighten..

Knowledge gain: When u hear “k-lok..k-lok” like using hammer knocking the floor board or like riding horse.... = UR ABSORBER SCREW LOOSE LIO!!!

Am in outstation now, will load the car kao-kao to run in the absorber on my way returning to KL later.. ;D

Warning: This DIY only applicable for suspension with similar design. Our front absorber is totally different and removal of front absorber, the car need to be jacked up and have wheels removed. So not all suspension are desinged the same.

Our rear spring is holding up the weight of the car and is a separated independent set of components. So by removing the rear absorber, the car won’t "drop" onto the ground.. :P

Happy DIY-ing.. ;)

Tuesday 15 August 2006

DIY Avanza Bumper Grille Net

This DIY is to cover our big nose and mouth so "flying" stones don't damage of aircond "radiator" which cost about RM2,000.. :P

Material: Whatever net you can find, metal aluminium ones are selling for RM48 from accesories shops (I think Brothers Acc. ada also).. I use garden fencing bought for RM18.90.. :P Loose wires and cable tie to secure the net.

Tools: Cutter, blade, screw driver and size 10 wrench to remove bumber.

Time: Estimated to be around 1 hour.

Instructions:

Bought this from ACE Hardware IKANO:


This is how the packing looks like:


Bumper removal, for detail > Removing Front Bumper..


Use loose wire to secure the "net":


U need to be creative enough to secure this.. ;D:


Result 1:


Result 2:


Balance of my RM18.90 garden fence:


Actual usage.. ;D:

Tuesday 1 August 2006

DIY Avanza Bonnet Insulation

Phew, took me 2 hours.

Material used: Carpet-like material bought from Brothers Kelana RM48 (120cm X 88cm). Black color type, not grey. Safeman used grey.. ;D ;D


The width of our bonnet is more than 120cm, so for perfect wrap till the edge, I split the mat into 2 piece and join in the middle.

By the time I finished one side, dinner was ready, so I had dinner first then continue. By the time I finished the complete job. Its about 8pm lio. To dark to take photos of the finished work.

DIY steps, my way... ;D

1. Mixed a pail of water with few drops of dish washing detergent. Use these water to clean the bonnet surface by wiping it using a piece of cloth to ensure surface is clean for applying the adhensive side of the mat.

2. Remove the wind screen washer nozzle.

3. Stick old news paper to half of the bonnet and mark down a rough shape of where to cut using pen. Then cut the paper loh and use it to mark the mat loh. Make sure its the right side because when we measure the newspaper is opposite side of the adhensive of the mat. Don't get it wrong. If wrong, then use it on the other half of the bonnet loh. And u have one more chance to get it right.. ;D ;D (for a while, I felt like a tailor.. ;D)


4. Now cut the mat. U may leave some extra space of about 2 inches at each side just in case because when we press the mat onto the bonnet ribs, it will take up some space. Once you finish one side, you will be more accurate on the other.

5. Now use a blade to lightly cut the adhensive protector (not the mat, just the protector) about 3 inches from the each edge. Then remove the protector, the central section of the mat leaving the 3 inches edge still protected by the adhensive protector.

6. Start with the top center and work towards the middle making sure each rib is securely stuck to the mat, then from the middle work towards the rest of the edges.

7. Once the middle section is done, now trim the edge of the mat (sections still with adhensive protector) using scissor and press it towords the bonnet to stick the edges.

8. Poke a hole on the mat for the windscreen washer nozzle and fix it back.

Now work on the other half of the bonnet... ;D I went and took my dinner before finishing the other half.. ;D ;D

Finished job: